Sunday, September 30, 2012

Weekend Snack Attack! Real Food for Your Weekend Out & About

Why is eating good food on the weekends so hard for me?? During the work week, I pack breakfast, lunch and snacks to store in the fridge at the office, but during the weekend I have a much harder time planning ahead. The result is a hungry me, standing in line for food at birthday parties, willing to ignore my food allergies and sensitivities. I think one difficulty I seem to have is figuring how to make real food portable and capable of surviving a full day in my bag. I'm getting better at planning but there is still much more that can and will be done. This weekend, I did make some headway and came up with a couple items that I was able to carry around with me: roasted Brussels sprouts and kale & shallot mini quiches.

Roasted Brussels Sprouts
Ingredients:
4 cups Brussels Sprouts
2 tsp Bavarian Spice
1 tsp Celtic Salt
2 tbsp Olive Oil

Process
1. Preheat oven to 425 

2. Wash Brussels Sprouts and slice in half length wise

3. Place into glass baking dish and pour oil evenly throughout the dish

4. Sprinkle salt and spices and mix well with a wooden spoon

5. Bake in oven for 35-40 minutes

6. Enjoy!


Kale & Shallot Mini Quiches (makes ten)
Ingredients:
4 stems of red kale
1 tbsp ghee
1 large shallot
8 eggs
1/2 tsp salt for kale
1/2 tsp salt for eggs
1/4 cup water
1/2 smoked paprika
1 tsp raw apple cider vinegar
Dash of pepper from a grinder


Process:
1. Preheat oven to 350 degrees

2. Heat ghee in pan

3. Chop shallots finely and put in pan to brown

4. While shallots are browning, chop kale very finely


5. Add kale into pan, add vinegar, salt, and paprika

6. Saute for 8 minutes and set aside to cool

7. In a bowl, break 8 eggs and salt salt and pepper

8. Whisk eggs for a few minutes and add water and whisk for a minute

9. Add in sauteed kale and mix well

10. Line a muffin tin with muffin cups, pour in mixture


11. Bake for 22-25 minutes


12. Enjoy!

Friday, September 28, 2012

How to Make the Best Kale Chips Ever!

It's been a really busy week and on top everything I'm doing, I'm also fighting a cold. Often times when I get sick, I get a nasty respiratory infection. I'm hoping that now that I'm dairy free, that it's going to be more mild, but at the same time, I'm not holding my breath. I've been going to see my acupuncturist, Vincent Kan, and drinking lots of tea and herbs so I'm hoping that will help.

Yesterday, we had a really fun off site event at work where we did a Murder Mystery Scavenger Hunt, and my team won! I got a gift card, which I used to buy a new cocktail dress to wear to a fancy birthday party coming up this weekend. I'm hoping that this cold gives me enough reprieve so that I can enjoy myself and that it doesn't bite in the butt after for not resting. Am I asking too much??

In the meantime, I wanted to make sure that I had plenty of nutritious snacks while I'm battling this cold. I've finally perfected my Kale Chip recipe and wanted to share it with you.

Smokey & Spicy Kale Chips
Ingredients
1 bunch curly kale
1/2 tbsp Hickory Smoked Salt
1/2 tbsp Turmeric
1 tsp Ginger
1 tbsp Coconut Oil

Process:
1. In a bowl, mix oil and spices and using your hands mix well until oil is melted


2. Rip kale leaves or stems and tear into smaller pieces no more than 1.5 inches

3. Wash kale leaves and put them into a bowl

4. Using your hands, gather oil mixture and massage into kale

5. Continue doing this until all mixture is used

6. Lay Kale onto Silpat mat


7. Dehydrate in oven at 145 degrees for 2 hours

8. If chips are still not crispy then raise temperature to 200 to 15-20 minutes

9. If you don't have a dehydrator, you can use your oven and set it to the lowest possible temperature (180-200) and prop oven door with a kitchen towel so that there is at least a 3-inch gap. Bake for 1.5-2 hours. Adjust time accordingly to ensure chips are crispy. All ovens are different so get to know yours

10. Enjoy!


Thursday, September 27, 2012

For the Love of Beets: Cumin & Mint Scented Beet Salad

My last post about borscht got me thinking about all the wonderful things you can do with beets. They really are an underutilized vegetable. Recently, one of my favorite blogs, The Whole Life Nutrition Kitchen, featured a great how-to on roasting beets. I had 2 weeks worth of beets from my CSA box from Full Circle and I decided to roast them and create a salad.

Cumin & Mint Scented Beet Salad
Ingredients
6 medium beets (I had 3 golden beets and 3 red ones)
1 tsp cumin seeds
3 tbsp lemon juice
2 tbsp olive oil
1 tbsp chopped mint
1 tsp Celtic Salt
1 cup romaine lettuce

Process:
1. Roast beets according to The Whole Life Nutrition Kitchen recipe
2. Slice Beets
3. In a bowl, mix beets, cumin seeds, 2 tbsp of lemon juice, olive oil, mint and salt
4. Mix well so that lemon juice, oil and cumin seeds are well distributed
5. Refrigerate for 1hr
6. Chop romaine lettuce and drizzle with lemon juice and additional olive oil if you'd like
7. Top lettuce with beets
8. Finish with Tula's CocoYo
9. Enjoy!


Wednesday, September 26, 2012

How to Make Authentic Russian Borscht

I was born in Riga, Latvia, a country in Eastern Europe that borders Russia. When I was born, it was still part of the USSR. I grew up eating a fairly traditional Easter European diet until we immigrated to the United States. My diet consisted of smoked fish, dark rye bread, fermented pickles and sauerkraut, homemade cottage cheese, caviar, cured meats and lots of soups. We always had a pot of soup at home, whether it was Uha (fish soup), vegetable soup with meatballs, bean soup, or my favorite, borscht. My mom always made the most amazing borscht. I could eat it daily and sometimes more than once a day. When I moved out of the house, making soup seemed so daunting to me and it was one of the last things I learned to cook.

A couple of years ago, I asked my mom to share her recipe with me. As I've mentioned before, I'm really bad at following recipes and luckily my mom is really bad at writing them down. She explained to me how she made it and gave me some pointers on how to get my borscht to be the most beautiful ruby red color. Over the last two years, I've been perfecting my recipe and now I am ready to share it with the world.

Authentic Borscht
1 lb of pastured/organic beef bones (knuckles and femur are best)
1 large pastured/organic beef short rib
1 large onion
3 medium beets
3 large carrots
1 small red or green cabbage
1/2 cup of sauerkraut
12 green peppercorns
2 tbsp Celtic Salt
1 spring of Parsley and another half spring for later
1 spring of Dill and another half spring for later

Process:
1. Put bones, short rib, onion, peppercorns, salt, parsley and dill into a large pot. I like to put the peppercorns and herbs into a large unbleached teabag 

2. Bring to boil and then reduce to low heat and cook for 24-36 hours

3. After broth is done cooking, let cool and take off layer of fat that forms at the top

4. Remove bones, but leave any meat inside the pot. Remove onion and bag of herbs

5. Peel beets and carrots and add to pot. Bring to boil

6. Shred cabbage

7. After about 45 minutes, remove beets and carrots and shred using a food processor

8. Add shredding beets and carrots back into the pot, add sauerkraut and cook for another 20 minutes

9. Chop dill and parsley and add into the soup

10. Turn off heat

11. Enjoy!


Tuesday, September 25, 2012

Answering the Ever So Popular Question: What Should I Eat?


This blog has been a culmination of over a decade of interest in healthy eating and healthy living. While, I may not have always eaten the most healthy diet, I've always been very occupied with what a healthy diet should look like. As part of this interest, I have seen countless practitioners from acupuncturists and nutritionists to energy healers and hypnotherapists.

When I got engaged in 2006, a friend of mine mentioned the Institute for Integrative Nutrition and their Health Coach program and she suggested I find a Health Coach in my area. That's when I found Stacey Morgenstern. I spent 6 months working with Stacey and she was instrumental to opening my eyes to a new way of eating. In this program, we discussed what the Institute for Integrative Nutrition refers to as Primary Food, which are not just the foods you eat, but everything else that feeds your soul and fulfills your life: your work, your relationships, your spiritual practice. In working with Stacey, I realized that a number of things in my life were preventing me from truly "feeding my soul." One of them was my former job. So when my husband (then fiance) called me to tell me he got a raise, I told him I'm walking into my boss's office and quitting that job. That was two weeks before the wedding.

Six years later, I am now enrolled in the Health Coach at the Institute of Integrative Nutrition and in 6 months, I, too, will be able to see clients. Now, when I tell people that I am enrolled in the program, many ask: "How should I eat?" I actually had 3 people ask that exact question over the weekend.

I'm not a professional just yet, and so I am not offering advice. I know what works for me and helped me lose weight, reduce inflammation, feel lighter, or just feel better and so my personal belief is to avoid eating anything white except for cauliflower.

What's White?
Flour
Milk
Iodized Salt
Potatoes
Sugar

Why I Don't Eat White Flour or Anything Made with White Flour:
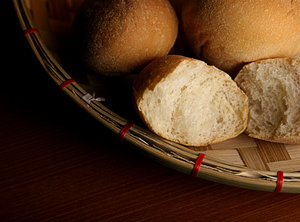
White flour is refined, stripped of all nutrients, and then bleached. Next, synthetic nutrients are added back into the flour. It is devoid of any fiber and even the nutrients added back into enriched flour aren't absorbed by the body and are often actually toxic.


Pandesal (Bread): No description

Why I Don't Drink Milk or Eat Dairy Products:
Even organic milk producers are milking their cows when they are pregnant or nursing because of how much milk they produce during this time. What allows them to produce so much milk? Hormones! And all of those hormones end up in your Milk. According to Walter Willet, head of Harvard's Nutrition program, drinking milk does not prevent bone fractures and actually has been shown to increase the prevalence of a number of cancers. Milk causes phlegm accumulation which leads to inflammation.

Milk 3: ...
                                                     

Why I Don't Eat Idolized Salt:
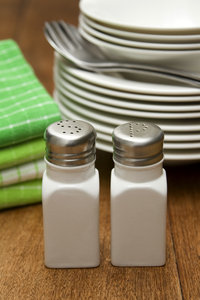
Regular table salt is white because it's bleached. If you've ever looked at Celtic Salt it's grey, Himalayan Salt is Pink and it is rare to find a natural salt that is white. Most table salt is made in a lab and is actual a chemical compound. This chemical salt disrupts the circulatory system, nervous system and balance of fluid.
                                                  
         
Salt & Pepper: visit http://www.vierdrie.nl

Why I Don't Eat Potatoes:
Potatoes are nightshades, a family of vegetables that have been shown to aggravate inflammatory conditions, especially arthritis and psoriasis. A recent study showed that potatoes are more likely to absorb radioactive materials from the soil than any other vegetable. Finally, when potatoes are fried, a toxic substance called acrylamide is formed. Acrylamide has been shown to cause cancer in lab animals.

   potatoes 3: none
   

Why I Don't Eat Sugar:
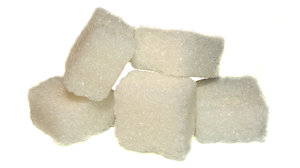
I can write a book about this, but I won't. Nancy Appleton has written 7 books about the topic and has sent me 3 to read and review. Once I read them and digest them, I will summarize why you shouldn't eat sugar, but in the meantime here are her top 10 reasons:


  1. Sugar can suppress your immune system.
  2. Sugar upsets the mineral relationships in the body.
  3. Sugar can cause juvenile delinquency in children.
  4. Sugar eaten during pregnancy and lactation can influence muscle force production in offspring, which can affect an individual’s ability to exercise.
  5. Sugar in soda, when consumed by children, results in the children drinking less milk.
  6. Sugar can elevate glucose and insulin responses and return them to fasting levels slower in oral contraceptive users.
  7. Sugar can increase reactive oxygen species (ROS), which can damage cells and tissues.
  8. Sugar can cause hyperactivity, anxiety, inability to concentrate and crankiness in children.
  9. Sugar can produce a significant rise in triglycerides.
  10. Sugar reduces the body’s ability to defend against bacterial infection.
Lump sugar: no description


You may not agree with everything I've mentioned here and that's okay. You can read hundreds of diet books and they will tell you a 100 different ways to eat. In the end, the only way that matters is the one that makes you feel your best. I think everyone should experiment with their diet and find the way to nourish themselves that is manageable long-term. Find the lifestyle that works for you and stick with it. That's the only way to lose weight, get healthy and feel your best!

Monday, September 24, 2012

Why Do The High Holidays Make Me Crave Carrot Cake?

At sundown tomorrow, the Jewish Holiday, Yom Kippur, or the Day of Atonement begins, ending the "10 Days of Repentance." It marks the beginning of the Jewish New Year. During these days, Jews are asked to contemplate their wrongs and ask for forgiveness from the ones they have wronged. It's similar to the 4th Step, in the 12 Steps of Alcoholics Anonymous and other 12 step programs, where you are tasked to do a "moral inventory" and make amends to the one's you have wronged and harmed with you illness.

Yom Kippur itself is a day of fasting, which to me represents a physical cleanse after a week of spiritual and emotional cleansing. This Yom Kippur will be unique for me because I have spent the last 6 months on a cleansing journey that has been physical, emotional and spiritual. I have worked on ridding my body of the excess weight of inflammation and from the emotional weight of anger and resentment. In this practice, I have been able to find myself and fulfill my passion of sharing with others my love for real food and cooking. I am so grateful that there are over 500 people that have shared this journey with me. Thank you.


For whatever reason, I associate the High Holy Days with Carrot Cake. Whenever, it's time to dip apples into honey, I crave the spiciness and richness of a delicious carrot cake. This year to satisfy my craving, I came up with my own grain-free vegan carrot cake muffin recipe. I prefer to bake in muffin tins, because it's the best way to control portion size. The muffins turned out delicious and very tasty.


Grain-Free Vegan Carrot Cake Muffins
1 1/2 cups chestnut flour
1/2 cup coconut flour
1 3/4 cups carrot pulp (approximately 2-3 carrots juiced)
1/4 cup apple pulp (1/2-1 apple juiced)
1/8 cup coconut oil
1/4-1/2 cup Grade A Maple Syrup (I used close to 1/2 cup and found it a bit too sweet)
2 tbsp chia seeds & 9 tbsp water
1 tbsp Apple Spice
1 tsp Powdered Ginger

1/2 tbsp aluminum free baking powder
1 tsp baking soda
1/2 tsp Celtic Salt


 Process
1. Preheat over to 350
2. In a bowl, mix chia seeds and water and let stand for 10 minutes
3. In another bowl mix all dry ingredients (flour, spices, baking powder, baking soda, salt)
4. Add wet ingredients to chia seeds (pulp, syrup, oil) and mix well
5. Using a mixer, mix on medium speed while pouring wet ingredients into the dry
6. Mix until all ingredients are well distributed, you should have a bunch of small chunks of dough
7. Line a muffin tin with baking cups
6. Take a heaping 1/4 cup of dough/batter and roll into a ball and place in baking cup and press until dough sits nicely in the cup


8. Bake for 20-22 minutes
9. Let cool on a wire rack.


Thursday, September 20, 2012

How To Make Vegan Salted Coconut Milk Caramel Ice Cream with Homemade Hemp Milk


So first things first!  The Spice House Contest is officially over and the winner of the contest is Masha. I will contact you directly to get your address! Congrats! Please check out my current giveaway for unbleached paper cooking and baking products from Beyond Gourmet!

Now to the really important stuff: how to make vegan salted coconut milk caramel ice cream. If you read yesterday's post, I had a little bit of a mishap in the kitchen while trying to making coconut milk caramel candies. But all's well that end's well. I used the caramel sauce for this recipe.


So first you have to make the sauce. I adapted the recipe from Saveur's recipe for Coconut Milk Caramels. I used unrefined Coconut sugar and maple syrup in my recipe instead of the white sugar and corn syrup in Saveur's recipe.

Coconut Milk Caramel Sauce:
Ingredients:
1 tsp Coconut Oil
1-16 oz. can coconut milk
¾ cup maple syrup
1 tsp. Celtic salt
1¾ cup Coconut Sugar
¾ cup water

Process:
1. Line a baking dish (either 8x8 or larger) with unbleached parchment paper and coat with coconut oil (to prevent sticking)

2. Combine the coconut milk, corn maple syrup and Celtic salt in a saucepan.  Heat over medium low, until all clumps have melted (2-5 minutes). Remove from heat and set aside.

3.In an another saucepan, combine coconut sugar and the water and stir until sugar is wet.

4. Place over medium high heat and let cook, without stirring until a candy thermometer reads 240°F.
5. Remove from heat and pour melted sugar into the coconut milk mixture.

6. Return saucepan to medium low heat, stirring continuously until all the caramel is dissolved.  Raise the heat to medium high, stir continuously and cook for 8-10 minutes. Make sure that the sauce pan is large enough to hold everything, because it can boil over

7. Pour into baking dish and refridgerate

8. You can enjoy this sauce with apples or pour into yogurt.


If you are feeling adventurous, you can make ice cream. For this Vegan Salted Coconut Milk Caramel Ice Cream, I made my own hemp milk, but you can use unsweetened hemp milk from Tempt.

Homemade Hemp Milk

Ingredients:
2 cups hulled hemp seeds (soaked over night)
4 cups water

Process:
1. Soak hemp seeds overnight

2. Run through a juicer with water or blend using a Vitamix

3. Use a Nut Milk Bag to drain the milk

4. Add water if you want a thinner consistency

5. Enjoy!


Vegan Salted Coconut Milk Caramel Ice Cream
Ingredients:
1 cup Homemade Hemp Milk
1 cup water
2 cups Coconut Milk Caramel Sauce
1 tsp of Celtic Salt

Process:
1. Pour milk into Ice cream maker

2. Slowly pour in Coconut Milk Caramel Sauce

3. Let run for 3 minutes and then pour in water and salt

4. Let run for 25-30 minutes

5. Enjoy!! It's freaking delicious!


So I Decided to Make Refined Sugar Free Coconut Milk Caramels...

Sometimes I get a little obsessive: I get an idea and I can't shake it until I see it through. On Sunday, the hubby, our daughter and I went to the Mill Valley Arts Festival and stopped by the Mill Valley Market to grab something to drink. While in the check out, a colorful bag of candy caught my eye. In bright white letters on a baby blue background, it read "Coconut Milk Caramels." Unable to contain my excitement I yelled "oh sh*t!" at the top of my lungs, frightening my husband and several old ladies standing in line. I didn't intend to be so vulgar, but these are COCONUT MILK CARAMELS we are talking about here and I haven't had a caramel in almost a decade! I turned the bag over to glance at the ingredients and was disappointed to see that they were made with brown rice syrup and so untouchable for the new, grain free me. But that didn't stop me from fantasizing about how I'm going to come up with the most amazing grain free and refined sugar free coconut milk caramels recipe.

So at 10pm, I decided it would a superb idea to try making caramels for the first time ever. Needless to say, by 10:30 the stove was covered in caramel sauce and I was ferouciously scraping off burned and blackened sugar off the burners. Luckily, the hubby was already asleep because had he been awake, I would have been throughly scolded for my impulsiveness. And so, I'm not sure if I actually made caramels, but I did make a tasty caramel sauce, which I can use for dipping apples. I'll try refridgerating it overnight and seeing if it hardens. It it turns out, I'll post the recipe. But lesson learned: do not attempt to make caramels at 10pm after a long hard day at work, especially if you've never made candy before.


But there is some good news, I did manage to make a tasty soup prior to delving into the candy making debacle. When I did the CAN CAN Cleanse last week, I ate/drank the most amazing soup for lunch. CAN CAN Cleanse's, Teresa Piro created a really delicious and satisfying lunch and I really wanted to make it at home. After one failed attempt to recreate the recipe, I decided to shoot Teresa and email. She was so kind to share her recipe with me and so I am sharing it with you.

CAN CAN Cleanse's Zucchini Basil Soup
Ingredients:
3 medium Zucchini
1 stalk Celery
1 Leek (white only)
1/4 Onion
2 sprigs Basil
1 tsp Sea Salt and more to season as you like
1/4 tsp Cayenne
1 tbsp Olive Oil
1-2 cups Filtered Water

Process:
1. Cut zucchini in half length wise and drizzle with olive oil and a large pinch of salt and place on baking sheet on unbleached parchment paper

2. On another baking sheet, place leek, celery, and onion and also drizzle with oil, salt, and cayenne pepper

3. Roast for 45 minutes at 325 degrees

4. Remove all ingredients and blend in a Vitamix or a blender with water to get desired consistency

5. Serve with a little coconut milk and dash of cayenne


6. Enjoy!

Tuesday, September 18, 2012

Gluten Free Celebrities and Blogs That Inspire Me

Nine years ago, when I gave up wheat and dairy after finding out I was allergic to it, I felt like a lone wolf. This was long before the gluten-free craze and before most stores had alternative options. Soy milk wasn't available in most Starbucks in San Francisco. Nowadays, being wheat and dairy free is much easier. Every weekend, I do my grocery shopping at Rainbow Grocery, which has one of the largest milk substitute sections I've seen. San Francisco now even has a gluten-free store, Gluten Free Grocery.

With all of the abundance, it has become just as easy to find heavily processed gluten free foods as it was to eat processed foods before. It was only when I began my 21-Day Detox Cleanse, that I realized how much junk food I was eating. The worst part was I felt just as sick not eating wheat as I did when I was still eating it. Switching my outlook and my focus has really helped. I have now embraced real food. I cook all of my meals, unless we go out, and all of the meals are made from scratch. Yes, this is time consuming, but I find ways to shorten cooking time, such as baking and stewing. One pot wonders have been lifesavers and kale chips have been a guilty pleasure staple.

The beauty of eating gluten-free, grain-free and dairy-free nowadays is that there are so many resources available. There are countless blogs that feature the most beautiful and delicious recipes. While, I'm absolutely horrible at following recipes, I find great inspiration from Against All Grain, The Nourishing Gourmet, Whole Life Nutrition, and Choosing Raw. Each one of these bloggers has a unique point of view and incredible love and passion for food and the recipes they share with us. Without them, this journey of self-discovery would not have been possible.

Also in the last 9 years, many celebrities have also discovered their own allergies to wheat and dairy. Besides my love for food and cooking, I also happen to be obsessed with celebrity gossip and have been an avid follower of Perezhilton.com since he began blogging in 2005 and heard him on Fernando and Greg in the Morning on the radio. As part of my love for celebrity gossip, I keep tabs on celebrities that have food allergies. One of my favorite actresses is Rachel Weisz and she shares my wheat intolerance. Likewise, Geri Halliwell, Ginger-Spice from the Spice Girls is also intolerant to wheat.


            Geri HalliwellRachel Weisz Picture 


Also, my style icon and favorite quirky actress, Zooey Deschanel, is gluten free. Unlike, Geri Halliwell and Rachel Weisz, Zooey Deschanel suffers from celiac disease, which is an autoimmune disease that affects the lining of the small intestine and can lead to serious malnutrition. One of Zooey's favorite places to enjoy vegan & gluten free treats, is BabyCakes in NYC. My family visited BabyCakes last year and it was delicious! In San Francisco, we also have a wonderful bakery that serves vegan & gluten free cupcakes, Cups & Cakes Bakery and I'm looking forward to ordering a box of cupcakes from them for my daughter's upcoming San Francisco birthday party.


Vegan & Gluten Free Cupcakes from BabyCakes in NYC


zooey-300.jpg

Monday, September 17, 2012

Be Good To Yourself: Switch to Unbleached Paper Cooking and Baking Products

Over the last year, we've tried to become more eco-friendly at the acraftygourmet.com headquarters, aka our house. I donated all of my non-stick Caphalon pots and pans, which I purchased while working at Williams-Sonoma and replaced them with enamel and cast-iron items from Le CreusetLe Creuset is know for not containing harmful chemicals like PFOA, a known carcinogen. According to Dr. Mercola, studies have shown that non-stick cookware heated to temperatures as low at 446 degrees, will release toxins into the air. I found that especially scary since I cook daily. I also got rid of all of my aluminum cookware, because aluminum has been shown to be a causal factor of Alzheimer's disease, which I have a high genetic predisposition for according to 23andme.com. Finally, I also stopped using aluminum foil and plastic wrap in the kitchen.

As part of my move away from foil, I switched to unbleached parchment paper. The reason I chose unbleached parchment paper is two-fold. First, it is much better for the environment. The process of bleaching paper products releases dioxins and chlorines into the air. Most European paper companies have moved away from the traditional process of bleaching, but many US companies still continue to practice it. But even the newer and improved method is still very harmful since it releases chloroform, a known carcinogen. Using unbleached paper products is also much better for the family and home. When using unbleached parchment paper, there are no harmful chemicals leaching into your food, tea, or coffee.

I've partnered with Beyond Gourmet to introduce my readers to their line of unbleached cooking and baking products. I am giving away 2 boxes of unbleached coffee filters, a box of unbleached baking cups, a box of mini unbleached baking cups, a package of unbleached cheese cloth, and one box of unbleached parchment paper.


To be entered into the contest, you must like A Crafty Gourmet on Facebook and then please comment below letting me know how you would use these products in your home. Contest will end on September 30th and a winner will be announced on October 1st. Good Luck! Also don't forget to enter my The Spice House contest.

Sunday, September 16, 2012

Grain & Gluten Free Breakfast Ideas! The Best Waffles Ever & Swiss Chard Hash


Weekend morning breakfasts at our house are usually kind of generic, a version of eggs and toast. So when this weekend the hubby asked me to make him something special for breakfast, I came up with two grain-free (both), Paleo (Hash Only), GAPS (Hash Only) and SCD (Hash Only), friendly recipes that will surely satisfy. Saturday morning, I made a Swiss Chard Hash. Then, on Sunday, I was craving waffles, so I made my usual waffle recipe but substituted grain-free flours. The waffles turned out great! For toppings, I used Tula's CocoYO and my spiced plum compote.

Swiss Chard Hash
Ingredients
1 bunch Swiss Chard
1 tbsp Ghee
1 tsp salt
1/2 tsp The Spice House Spanish Smoked Paprika 
4 eggs

Process:
1. Heat ghee in a pan
2. Chop Swiss Chard finely
3. Once ghee has melted add Swiss Chard, salt and paprika
4. Saute Chard for 6-8 minutes
5. Add eggs in sunny-side up fashion, cover, cook for 5-7 minutes or until whites are fully cooked
6. Enjoy!


Grain-Free Vegan Waffles
Ingredients
1/2 cup chestnut flour
1/2 cup buckwheat flour
1/2 cup potato starch
1/4 cup coconut flour
1/4 cup applesauce
1/2 cup coconut milk
1/2 cup coconut oil (melted)
1 cup water
2 tbsp raw honey
2 tsp baking powder
1/2 tsp salt

Process:
1. Mix all dry ingredients together and separately mix all wet ingredients together
2. Add wet ingredients to dry and mix on medium speed with a mixer
3. Scoop heaping 1/4 cup of batter onto oiled waffle maker
4. Depending on your waffle maker, cook for 8-10 minutes
5. Add your favorite waffle syrup or toppings
6. Enjoy!


If you are interested in learning more about going grain-free, Jill at Real Food Forager is teaching a class to help you. If you want to sign up for the class use the coupon code NOGRAINS and receive an additional $20off. The coupon expires September 25th. And don't forget about my Spices Contest!


Saturday, September 15, 2012

UCSF Studies on the Paleo Diet & Easy Grain-Free Quinoa Side Dish

In the last year, I feel like all of a sudden everyone is talking about some form of a grain-free diet. Whether it's Paleo, GAPS, SCD, Slow-Carb, nutritionists, acupuncturists, and health coaches are recommending going grain-free to help alleviate a variety of ailments from arthritis and autism to MS and psychological disorders. A UCSF study actually showed that when healthy volunteers followed a Paleolithic diet for 10 days (eating lean meat, fruits, vegetables and nuts and excluding grains, dairy and legumes) they reduced their blood pressure, improved their glucose tolerance and improved their lipid levels (cholesterol). Another study showed that the Paleo diet was better than the standard diabetes diet in improving heart attack risk in patients with type 2 diabetes.

The interesting thing about the Paleo diet is that it is a form the "real food" diet. While there are many companies trying to jump on the Paleo bandwagon, if you are eating the hunter-gatherer diet, you are eating whole foods that are not found in boxes. It is so interesting that a diet that has been proven to be more beneficial that what the American Dietetic Association recommends for type 2 diabetics hasn't become mainstream. One of the reasons that it's not mainstream may simply be a conflict of interest. The ADA influences the dietary guidelines set by the USDA. The ADA is a non-profit organization that is heavily financed by companies such as Kellogg's, Coca-Cola, Pepsi, and Hershey. So it's important to remember that the American Dietic Association is an industry friendly organization and not exactly the best source of dietary advice.

As part of my efforts to alleviate my lower back pain, I have been practicing a grain-free and dairy-free diet, which isn't Paleo because I choose to consume legumes. My pain has vanished. To me it feels miraculous. After spending 8 months seeing countless doctors and being poked and prodded, it's been amazing to see that the first medicine is food. If you are suffering from arthritis, gout, high blood pressure or if you are overweight, I recommend trying one of the diets mentioned above or all of them to find which one you can adopt as a lifestyle.

Like the UCSF study, you can try it for 10 days and work with your doctor to take blood before you begin and after 10 days. If you have a doctor that you do not feel is supportive, get a new one. I recommend One Medical Group. They have offices in the SF Bay Area, New York and Washington, D.C. From personal experience, I feel you will be able to find a doctor there willing to participate in your personal experiment.

In the meantime, I have a great satisfying Quinoa dish that you can enjoy. Quinoa is not a grain. It's actually seed that is closely related to beets and spinach. It contains the large amounts of the amino acid lysine, a necessary protein building block which is essential for calcium absorption, and hormone, enzyme and antibody production. It's high is calcium and is the considered to be a complete protein, meaning it contains all 9 essential amino acids.

I always keep Gogo Rice's Organic Cooked Quinoa in my pantry in case I forget to soak some. Since the Quinoa only needs to be heated, this side dish takes less than 5 minutes to prepare.

Quinoa Primavera Pilaf
Ingredients
1 package of Organic Cooked Quinoa
1 cup spinach
1 large carrot
1/2 parsley
1 tbsp raw apple cider vinegar
1 tbsp olive oil
1 tsp Celtic Salt
dash of pepper
dash smoked paprika

Process:
1. Empty quinoa into a pan and heat on low with a tbsp water so it doesn't burn
2. In a food processor or by hand, grate carrot
3. Chop spinach and parsley finely
4. Toss carrots, spinach, and parsley into pat and heat everything for 2 minutes (add more water if needed)
5. Empty into a bowl and add vinegar, salt, oil and spices
6. Mix and Enjoy!


If you are interested in learning more about going grain-free, Jill at Real Food Forager is teaching a class to help you. If you want to sign up for the class use the coupon code NOGRAINS and receive an additional $20off. The coupon expires September 25th. And don't forget about my Spices Contest!


Thursday, September 13, 2012

Last day of my CAN CAN Clease, Easy Jerky Recipe, and Finally The Juil Contest Winner Announced!

So today, I finished my last day of the CAN CAN Cleanse. I do have to say, I won't be doing that for a while. It was by far one of the harder things I've done in my life. I seriously recommend it to anyone who loves a good challenge. But I definitely feel more clear headed and my skin is glowing. So call the girls up and tell them I sent you!!

I'm ready to get back to eating my food vs. drinking it. I prepped my meals for tomorrow and am treating myself for a very special snack: beef jerky! Jerky happens to be one of my favorite snacks, but it's a difficult one to find without soy sauce, sugar, wheat flour, and other ingredients I try to stay away from. I usually buy my beef jerky from Fatted Calf, but it also happens to cost $40lb! That's some expensive meat! So I decided to save a few bucks and make my own.

Beef Jerky
Ingredients
1/4 lb of lean cut beef (I used flank steak)
2 tsp fine grain Celtic salt
2 tbsp raw apple cider vinegar
2 tsp raw honey

Process:
1. Place beef in freezer for 2 hours
2. Remove beef and cut into thin slices
3. Put all ingredients into Glasslock container and shake for 1 minute


4. Place container into refrigerator for 6-24 hours, depending on how long you prefer to marinate it. I did it 24 hours.

5. Set oven on dehydrate setting and set temperature to 145 degrees. If you don't have a dehydrate setting then set on lowest setting (could be 200), and prop oven oven doors leaving a 3 inch gap using a dish towel.

6. Place meat on Silpat mat. You can also just do it on the oven rack. Don't use parchment paper or foil, because you won't get the same results. You need air to circulate all around the pieces.


7. Dehydrate/Bake for 8-12 hours (depending on your oven)

8. Enjoy!


And finally, I would like to thank the wonderful team at Juil for sponsoring this contest. I hope everyone that entered will consider buying a pair or 2 or 3 of these amazing sandals and shoes. Personally, I'm looking forward to the Mary Jane's they are working on! Using, RANDOM.org, I put everyone's name in a list to randomize and the winner is Maryin Quezada! Please email me your address, the shoe you would like as well as the size to Gabyatacraftygourmetdotcom. Congratulations to you and thank you to everyone who entered. Please don't forget to enter my The Spice House Contest and good luck to you!

Wednesday, September 12, 2012

Learning More about CAN CAN Clease and day 2/3

Day two was much easier than the first day, which was actually pretty surprising. I was expecting it just to get worse but it actually wasn't a hard today. The schedule was the same:

8:00am Juice #1 (Lemon Lime Juice)
9:00am Juice #2 (Green Juice)
10:30am Juice #3 (Hibiscus Tea)
12:00 Juice #4 (Zucchini Basil Soup)
2:30 Juice #5 (Watermelon Juice)
5:00 Juice #6 (Green Juice)
7:00 Juice #7 (Nut Milk)
8:00 Juice #8 (Lemon Balm Lavender Tea)

I didn't find myself as hungry today as I was yesterday. Also, it's pretty nuts at work and even on the juice cleanse, I was able to think straight and concentrate on my tasks. 

I spent much of the day thinking about how well organized the cleanse is. I could tell that much care went into planning the juices and developing the recipes. I was extremely curious about how the idea came to be, so I gave the girls and CAN CAN Cleanse a call to ask them some questions about their amazing business.

CAN CAN Cleanse's was founded by Teresa Piro, a Seattle, Washington native who moved to San Francisco 11 years ago.  Her childhood experiences with her grandparents home garden in Portland and her studies in Holistic Nutrition at Bauman College really shaped her views on nutrient rich foods and how they make us feel. The idea for the cleanse came from the desire to remind others how their food choices make them feel. According to Teresa, "letting the digestive system relax and reset leads us to discover physical and mental clarity." I couldn't agree more!

I was also interested in the unique concept of combining juices, soups and teas. Teresa felt that people often times have a hard time drinking cold juices all day long, especially in San Francisco where it's never really that hot. So, she found her clients did much better with the hot soup and hot teas. She found that it was more satisfying and more enjoyable that way. This is the sole reason I chose CAN CAN over all other cleanses: I loved the idea of warm beverages during a cleanse. She also adds cayenne pepper or cinnamon to most of the blends to give them more warming qualities.

Finally, CAN CAN knows that the cleanses aren't easy and they don't believe they should be. Teresa believes in an act of mindfulness to follow the schedule and to be fully aware of what you are consuming. She believes: "the result is an invigorating and inspiring feeling that puts us back on a healthy track."

CAN CAN recommends that your do cleanses seasonally, and I'm definitely looking forward to trying their updated flavors 3 months from now.


Tuesday, September 11, 2012

Dancing the CAN CAN while on the CAN CAN Cleanse!

So after all the eating out and indulging in cake since I ended my detox cleanse, I was thinking that I'd like a little reboot. I didn't really care to do anything major since I did just do a 21-detox cleanse, but just a little pick me up! I'd done a juice cleanse once before, about 2 years ago when I bought 18 bottles of 16oz juices from Whole Foods. At the time, I was feeling sick after eating Chipotle daily for lunch for 6 months. By day three, at 10:30 am, I hopped on the bus to the nearest gluten-free bakery and bought a sandwich!

When I was researching cleanse companies in the SF Bay Area, I found CAN CAN Cleanse! I called the girls up and they were kind enough to let me try their cleanse! The cleanse consists of 8 juices, teas, a nut milk, and an amazing, absolutely delicious soup for lunch!  But honestly, the best part of the cleanse are these jars that they come in!  I can't wait to come up with all the crafty ways to utilize them.


So yesterday was my first day. It started with a Lemon Lime Juice at 8:00am. When I drank it, it reminded me of the Master Cleanse, but without any sweetness. It was super tart, but I really enjoyed it. It was a great pick me up in the morning.


At 9:00am, I had the Green Juice, which is made with celery, cucumber, green cabbage, broccoli, fennel, romaine, spinach, kale, parsley, ginger, lemon and apple. I have to say that for all those veggies, I found the juice a little light. The flavor was amazing, but I wanted it to be more thicker. I think that's more about personal preference, since store bought veggie juices don't usually contain pulp. Because I own a slow juicer and a Vitamix, I tend to like juices on the thick and pulpy side. When I had the Breville the juices definitely contained very little pulp and I know people love that juicer.


So by 10:30, my stomach was growling and I was thinking: "why am I doing this again?," but I kept at it, since it's for both personal and blog related R&D (research & development). I love challenging myself :). I didn't realize until today (day 2, 9pm) that I could've actually just had a snack. CAN CAN provides a great list of "cheat" foods you can snack on, that won't affect the effectiveness of the cleanse.

Speaking of effectiveness, you're probably all wondering: What's the point? I believe, juice cleanses are a great way to clean on all the gunk hanging out in the intestines and organs. It's like an oil change for your car. It helps with cravings and with aches and pains, which I've been suffering from. Here's a great summary of the health benefits of juice cleanses.

So with my stomach was growling, I had juice #3, a very flavorful Hibiscus Tea.


By 12:00, I was beyond ready for lunch. I was in luck, because Juice #4 was actually a soup, a bowl of hot, nourishing soup. The Zucchini Basil Soup was actually incredible! Thick and creamy, it's made with Zucchini, Basil, Broccoli, Celery, Leeks, Garlic, Onion, Cumin, Coriander, Cayenne Pepper, Lemon Juice, Sea Salt, Filtered Water. I think I will be making this one at home once I'm done with the cleanse!


At 2:30, I had a treat with Juice #5, Watermelon Juice made with watermelon, apple, & lime. It was a nice satisfying drink, especially since juices 1-4 weren't that sweet.


The next juice wasn't until 5:00pm and by that point, I was ready to chew off my own arm. Again, this was totally my fault since I could have had a snack, but was trying to follow the juice program 100%. At 5:00, I gulped down another Green Juice and was somewhat satiated.


Because I was busy, picking up my daughter from pre-school, feeding her and the hubby, I didn't have time to think about that my next juice wasn't until 7:00pm. The good thing about Juice #7 is it's actually a nut milk made with vanilla and dates. It was really rich and creamy, but not super sweet like the Blueprint Cleanse's Cashew Milk, which also has a really thick gooey texture.


An hour later, I had Juice #8, a Lemon Balm & Lavender Tea, which was very aromatic. Lavender and Lemon Balm are both relaxing and calming herbs, so this was a perfect way to end the day.


Overall, I really enjoyed all of the flavors of the juices and teas, but I was definitely hungry. I think that's the point of a cleanse though, you aren't meant to enjoy it, but your insides are enjoying it on your behalf. Cleanses are a really great way to reboot and recharge, so even if I'm feeling a bit tired and hungry on day 1, I know that once I'm done, I'll be feeling refreshed. Or at least that's my hope. Stay tuned tomorrow to see how I'm doing!


Monday, September 10, 2012

Saturday Night Crafty Gourmet Dinner In: Veal Sweatbreads with Spiced Plum Sauce and Tangy Broccolini

Since the hubby and I have decided to limit how often we eat out, I decided to spice things up for our Saturday night dinner. Why shouldn't we enjoy restaurant quality food in the comfort of our home?

I paid a visit to my favorite butcher shop this afternoon, and was excited to find they had veal sweetbreads in stock. As I've mentioned before, sweetbreads are my favorite food. I really wanted to make this dinner special. I spent the a few hours thinking about how I could combine what's in my fridge to create a really unique and tasty dish. For the past two weeks, my CSA box was filled with plums and we haven't had the chance to eat them, so I decided to make a spiced plum compote and then reduce that compote as a sauce for the sweetbreads. That seemed special enough to me.

Spiced Plum Compote
Ingredients:
10 plums (cut in half)
3 star anise
1 cinnamon stick
2 cardamon pods
1 cup of water
1 tbsp raw honey

Process:
1. Place all ingredients in a pot or dutch oven

2. Bring to boil, reduce heat to low and cook for 1hr


Smokey Crispy Sweetbreads with Spiced Plum Sauce & Tangy Broccolini
Ingredients:
1lb Veal Sweetbreads
1/8 cup chestnut flour
1 tsp smoked paprika
3 tsp Celtic salt
1/2 tsp Hungarian paprika
1 tbsp ghee
1 bunch broccolini
1 tbsp apple cider vinegar
1 tbsp olive oil

Process:
1. Earlier in the day, bring a pot of water to boil and cook sweetbreads for 20 minutes
2. Remove sweetbreads and place in a airtight container to cool for several hours


2. Later, place 2 tsp salt, paprika, and chestnut flour in a bowl and add sweetbreads and mix


3. Heat ghee in a pan and add sweetbreads

4. Cook for 5-6 minutes

5. In another pan, steam broccolini for about 10 minutes or until desired texture

6. While sweetbreads & broccolini are cooking, take 1/2 cup of spiced plum compote and reduce on high heat until thickened (10-12 minutes), stir often to prevent burning


 6. Lay sweetbreads over sauce on plate with broccolini on the side


7. Enjoy!

Cooking.com